How to Use Adobe Lightroom for Professional Photo Editing

Photo editing has become an integral part of creating stunning images, whether you’re a professional photographer or an enthusiast. Adobe Lightroom is one of the most powerful tools available for photo editing, offering a wide range of features that can take your images to the next level. This guide will walk you through the essential steps of using Adobe Lightroom for professional-level photo editing, helping you master the software for your projects.
Understanding the Lightroom Interface
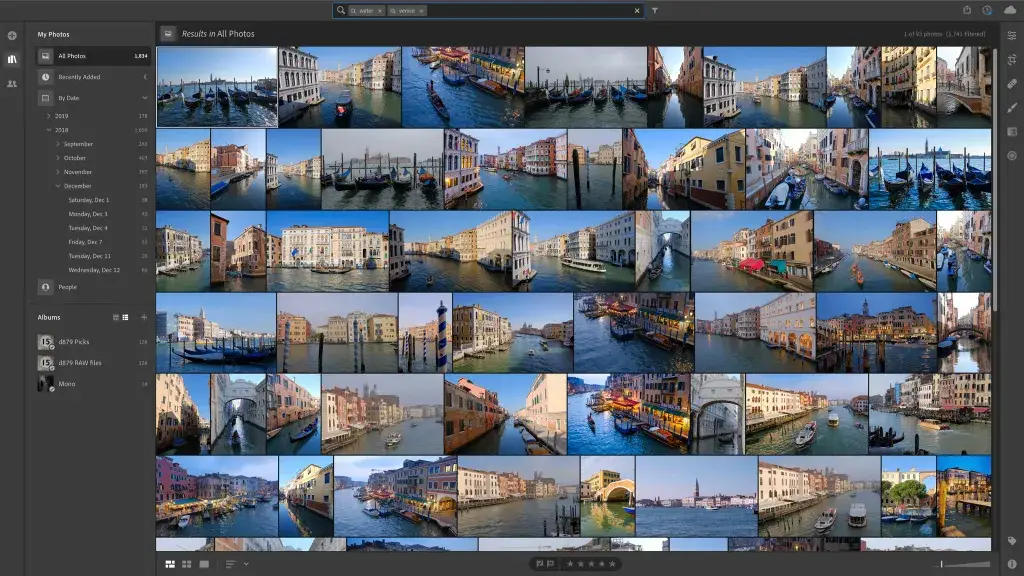
Before diving into editing, it’s important to familiarize yourself with Lightroom’s interface. The software is divided into several modules, but the two most important ones for editing are Library and Develop.
- Library Module: This is where you manage and organize your photos. You can import, sort, and rate your images in this section.
- Develop Module: This is where the magic happens. Here, you’ll perform all the actual editing, from adjusting exposure to applying creative filters.
Lightroom’s interface is intuitive, with sliders and tools that make photo adjustments accessible even if you’re new to the software.
Importing Photos into Lightroom
To begin editing, you first need to import your photos into Lightroom. You can do this by clicking the “Import” button in the Library module. Lightroom allows you to import from your computer, an external drive, or directly from your camera.
After selecting your images, you can organize them into folders or collections. Folders represent the actual location on your computer, while Collections are virtual folders that help you group related photos.
Organizing Your Workflow
Organization is key to a smooth workflow in Lightroom. Start by assigning star ratings or flags to your photos. This helps you quickly identify your best shots for editing. For even better organization, use keywords and metadata. Adding descriptive keywords to your images allows you to find specific photos easily, especially in large catalogs.

Basic Photo Editing Tools in Lightroom
Once your photos are imported, it’s time to start editing. The Develop module offers a range of basic tools that can dramatically improve your photos:
- Cropping and Straightening: Correct your photo’s composition and aspect ratio.
- Exposure and Contrast: These sliders adjust the overall brightness and difference between light and dark areas of the photo.
- White Balance: Correct color casts by adjusting the temperature (warmth) and tint of your image.
- Tone Curve and Histogram: Fine-tune the exposure and contrast further using the tone curve, which gives you more control over specific tonal ranges.
Advanced Editing Tools in Lightroom
For more control over your images, Lightroom offers several advanced tools:
- HSL/Color Panel: This panel allows you to adjust the hue, saturation, and luminance of specific colors in your image. It’s perfect for tweaking individual tones.
- Split Toning: This feature is great for creative color effects. It lets you apply different tones to the highlights and shadows separately.
- Graduated Filter, Radial Filter, and Adjustment Brush: These tools allow for localized adjustments, meaning you can fine-tune specific areas of your photo without affecting the entire image.
Editing Portraits in Lightroom
Portrait editing requires careful attention to detail. Lightroom’s tools can help you enhance skin tones, reduce blemishes, and sharpen key details like the eyes.
- Skin Tone Adjustments: Use the HSL panel to soften or enhance skin colors for a more flattering look.
- Sharpening and Noise Reduction: Increase sharpness to highlight details while using noise reduction to smooth out grainy areas.
- Spot Healing and Red-Eye Correction: Lightroom’s spot healing tool is perfect for removing small blemishes, while the red-eye tool helps correct lighting issues in portraits.
Landscape Photo Editing in Lightroom
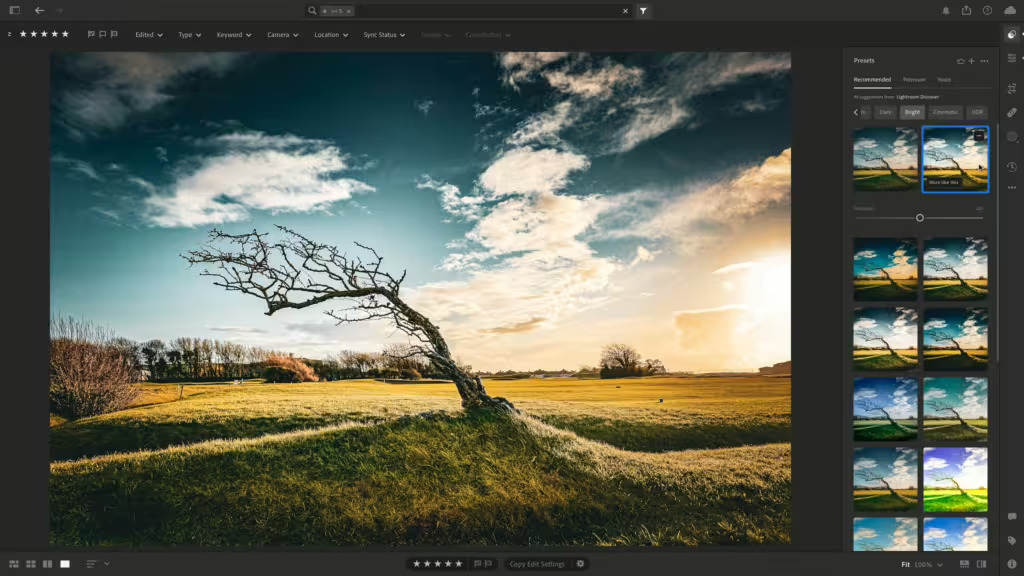
Editing landscapes often involves making skies pop and bringing out details in natural textures.
- Enhancing Skies: Use the graduated filter to selectively darken or enhance the colors of the sky without affecting the ground.
- Clarity and Texture: Adjust these sliders to give your image more depth and sharpness, especially in landscapes with intricate details.
- Dehazing: This tool helps reduce atmospheric haze, revealing more detail and contrast in the image.
Using Presets for Efficient Editing
Presets are pre-saved adjustments that you can apply to your photos with a single click. They’re incredibly helpful for maintaining consistency across a set of images or speeding up your editing process.
- Quality Presets: You can download presets from various sources online, often designed for specific styles such as portraiture, weddings, or landscapes.
- Creating Your Own Presets: After fine-tuning your adjustments, you can save these settings as a preset to use later. This is especially useful for editing multiple photos in a similar style.

Working with RAW Files in Lightroom
Professional photographers often shoot in RAW format because it preserves more data than JPEG, offering greater flexibility in editing.
- Advantages of RAW: You can recover more details from shadows and highlights, adjust white balance more effectively, and avoid compression artifacts.
- Lightroom and RAW: Lightroom excels at working with RAW files, allowing you to make significant changes to the image without degrading quality.
Exporting Photos from Lightroom
After editing, you’ll want to export your photos in a format that suits your needs, whether it’s for web, print, or social media.
- Web and Social Media: Export in JPEG with a resolution of 72 dpi, ensuring fast load times.
- Print: Use TIFF or high-resolution JPEG formats, and set the resolution to 300 dpi for optimal print quality.
- Choosing File Formats: JPEG is the most common format for online use, but TIFF is preferred for print because it retains more detail.
Conclusion
Adobe Lightroom is a versatile and powerful tool for professional photo editing. Its intuitive interface, combined with both basic and advanced tools, makes it suitable for a wide range of users, from beginners to professionals. Whether you’re working on portraits, landscapes, or a variety of other photography styles, Lightroom can help you elevate your work to a professional standard. Keep practicing, and exploring different tools.


